Wednesday, April 13, 2011
Moving...
www.dconawhim.blogspot.com
Sunday, February 13, 2011
Valentine Scratch Cards
Thursday, January 20, 2011
Testing America's Test Kitchen
I love watching America's Test Kitchen. The other night they were testing chocolate chip cookie recipes. I decided to try out their recipe and it was delicious. I love hearing the explanations of why ingredients and methods do what they do. And I love that my cookies turned out exactly like the ones they made on the show. They still flattened out quite a bit, but that's the sacrifice you make for butter. Their winning recipe and method took a little extra time. They browned their butter (always a good thing) and then waited 10 minutes to really let the sugars dissolve. They turned out just slightly crispy on the edges and extra chewy on the inside. I also used their recommended chocolate chip, Ghirardelli bittersweet chocolate chips.
(These photos were taken right out of the oven. They flattened a little more.)
Go here to see the full recipe with explanations.
Perfect Chocolate Chip Cookies
Ingredients
- 1 3/4 cups unbleached all-purpose flour (8 3/4 ounces)
- 1/2 teaspoon baking soda
- 14 tablespoons unsalted butter (1 3/4 sticks)
- 1/2 cup granulated sugar (3 1/2 ounces)
- 3/4 cups packed dark brown sugar (5 1/4 ounces) (see note)
- 1 teaspoon table salt
- 2 teaspoons vanilla extract
- 1 large egg
- 1 large egg yolk
- 1 1/4 cups semisweet chocolate chips or chunks (see note)
- 3/4 cup chopped pecans or walnuts, toasted (optional)
Instructions
- 1. Adjust oven rack to middle position and heat oven to 375 degrees. Line 2 large (18- by 12-inch) baking sheets with parchment paper. Whisk flour and baking soda together in medium bowl; set aside.
- 2. Heat 10 tablespoons butter in 10-inch skillet over medium-high heat until melted, about 2 minutes. Continue cooking, swirling pan constantly until butter is dark golden brown and has nutty aroma, 1 to 3 minutes. Remove skillet from heat and, using heatproof spatula, transfer browned butter to large heatproof bowl. Stir remaining 4 tablespoons butter into hot butter until completely melted.
- 3. Add both sugars, salt, and vanilla to bowl with butter and whisk until fully incorporated. Add egg and yolk and whisk until mixture is smooth with no sugar lumps remaining, about 30 seconds. Let mixture stand 3 minutes, then whisk for 30 seconds. Repeat process of resting and whisking 2 more times until mixture is thick, smooth, and shiny. Using rubber spatula or wooden spoon, stir in flour mixture until just combined, about 1 minute. Stir in chocolate chips and nuts (if using), giving dough final stir to ensure no flour pockets remain.
- 4. Divide dough into 16 portions, each about 3 tablespoons (or use #24 cookie scoop). Arrange 2 inches apart on prepared baking sheets, 8 dough balls per sheet. (Smaller baking sheets can be used, but will require 3 batches.)
- 5. Bake cookies 1 tray at a time until cookies are golden brown and still puffy, and edges have begun to set but centers are still soft, 10 to 14 minutes, rotating baking sheet halfway through baking. Transfer baking sheet to wire rack; cool cookies completely before serving.
Saturday, January 15, 2011
Going Gray
I really wanted to do gray and orange and wasn't sure how it was going to come together, but I'm happy with the result.
I bought an extra set of orange curtains and my mom made a crib skirt out of one panel (the other one makes an excellent table cloth). The fabulous vinyl wall art is from blik. We used blik for the girls' room as well.
The pictures don't quite do the colors justice, but you get the idea.
BEFORE:
AFTER:
BEFORE:
AFTER:
BEFORE:
AFTER:
Tuesday, December 21, 2010
Screen Printing: Coasters
There is something so satisfying about removing the screen and seeing the printed result.
Sunday, December 19, 2010
Matchbox Garland Advent
After a trial garland with buttons that turned out to be too small and making one as a gift and one for myself, I ended up sewing 75 buttons. I'm done sewing buttons for a while.
The kids love pulling out candy each day.
Thursday, December 16, 2010
Muffin Tin Advent
I have an ever growing list of advent calendars that I have seen on different design blogs that I want to create. In November I made two different advents. Here is my version of the mini muffin tin advent.
I used vintage images and backgrounds to create the round magnets that cover up the holes. I created everything in Photoshop and then printed them on magnet paper.
Hiding inside each hole is a bottle cap magnet with a number:
I always like visual reminders of the countdown so each day you remove a number and place it on the outside:
Then bake some mini muffins!
I made one for each of my siblings. Now I just need to make one for myself...
Sunday, November 7, 2010
Pumpkin!
Pumpkin Whoopie Pies:
(Recipe found at MarthaStewart.com)
Pumpkin Swirl Brownies:
These were so good eaten warm right out of the oven. And equally good the next day. Perfect mix of pumpkin and chocolate.
(Recipe found at MarthaStewart.com)
Pumpkin Cinnamon Rolls with Cream Cheese Frosting:
(These were soooo yummy. Especially good warm with a cup of cocoa.)
Pumpkin Cinnammon Rolls
(recipe found on GoodLife Eats)
Ingredients:
Roll Dough:
1/4 cup warm water (not hot, about 110 degrees)
1 package (2 1/4 teaspoons) active dry yeast
1/3 cup warm milk
1 large egg, beaten
3/4 cup pumpkin puree, either fresh or canned
1 tablespoon melted butter
2 cups (approximately) All-Purpose Flour
1 1 /4 cup Whole Wheat Flour
1/2 cup brown sugar
1 teaspoon salt
1/2 teaspoon cinnamon
1/4 teaspoon ground ginger
1/4 teaspoon ground cardamom
Filling:
1 stick butter
2/3 cup white sugar
1/4 cup brown sugar
2 teaspoons cinnamon
1/2 teaspoon each of allspice and ginger
1/4 teaspoon nutmeg
1/8 teaspoon cloves
Cream Cheese Frosting:
4 ounces cream cheese
1 stick (4 ounces) butter, softened
1 teaspoon vanilla extract
3/4 teaspoon lemon juice
2-3 cups powdered sugar
Directions:
In a large bowl, stir yeast into water to soften. Let rest for 5 minutes before stirring. Add milk, eggs, pumpkin, butter, 1 1/4 cups whole wheat flour, brown sugar, salt, cinnamon, ginger and cardamom to yeast mixture. Beat vigorously for 2 minutes.
Gradually add remaining flour (all purpose), a little at a time, until you have a dough stiff enough to knead. Start with about 1 1/2 cups and increase if necessary. Turn dough out onto a floured surface. Knead, adding flour as necessary, until you have a smooth, elastic dough.
Put dough into an oiled bowl. Turn once to coat entire ball of dough with oil. Cover with a towel and let rise until doubled, about 1 hour.
Combine the white sugar, brown sugar, cinnamon, allspice, ginger, nutmeg and cloves in a small bowl, set aside. Transfer the risen dough to a lightly greased work surface, and pat or roll it into a 16" x 12" rectangle. Spread softened butter over dough and then sprinkle with the sugar mixture.
Roll the dough into a log the long way; it'll stretch to about 20" long as you roll. Using a very sharp knife, slice the log into 15 slices. In order to cut down on drag, it helps to rinse the blade in hot water, and wipe it off, between slices. Place slices in a greased 9x13 inch baking pan (or in two 8 or 9 inch round cake or pie pans). Cover with a towel and let rise until almost doubled, about 45 minutes.
Bake in a preheated 375°F oven. Bake the rolls till they're brown around the edges and beginning to turn golden brown across the center, about 20-30 minutes.
While rolls bake, prepare the cream cheese frosting. Add the cream cheese, butter, vanilla, and lemon juice to a small food processor. Blend until smooth and combined. Add the powdered sugar 1/2 cup at a time, blending in between, until well mixed and desired consistency is reached. (I used 2 cups powdered sugar)
Frost warm rolls with the cream cheese frosting and serve immediately.
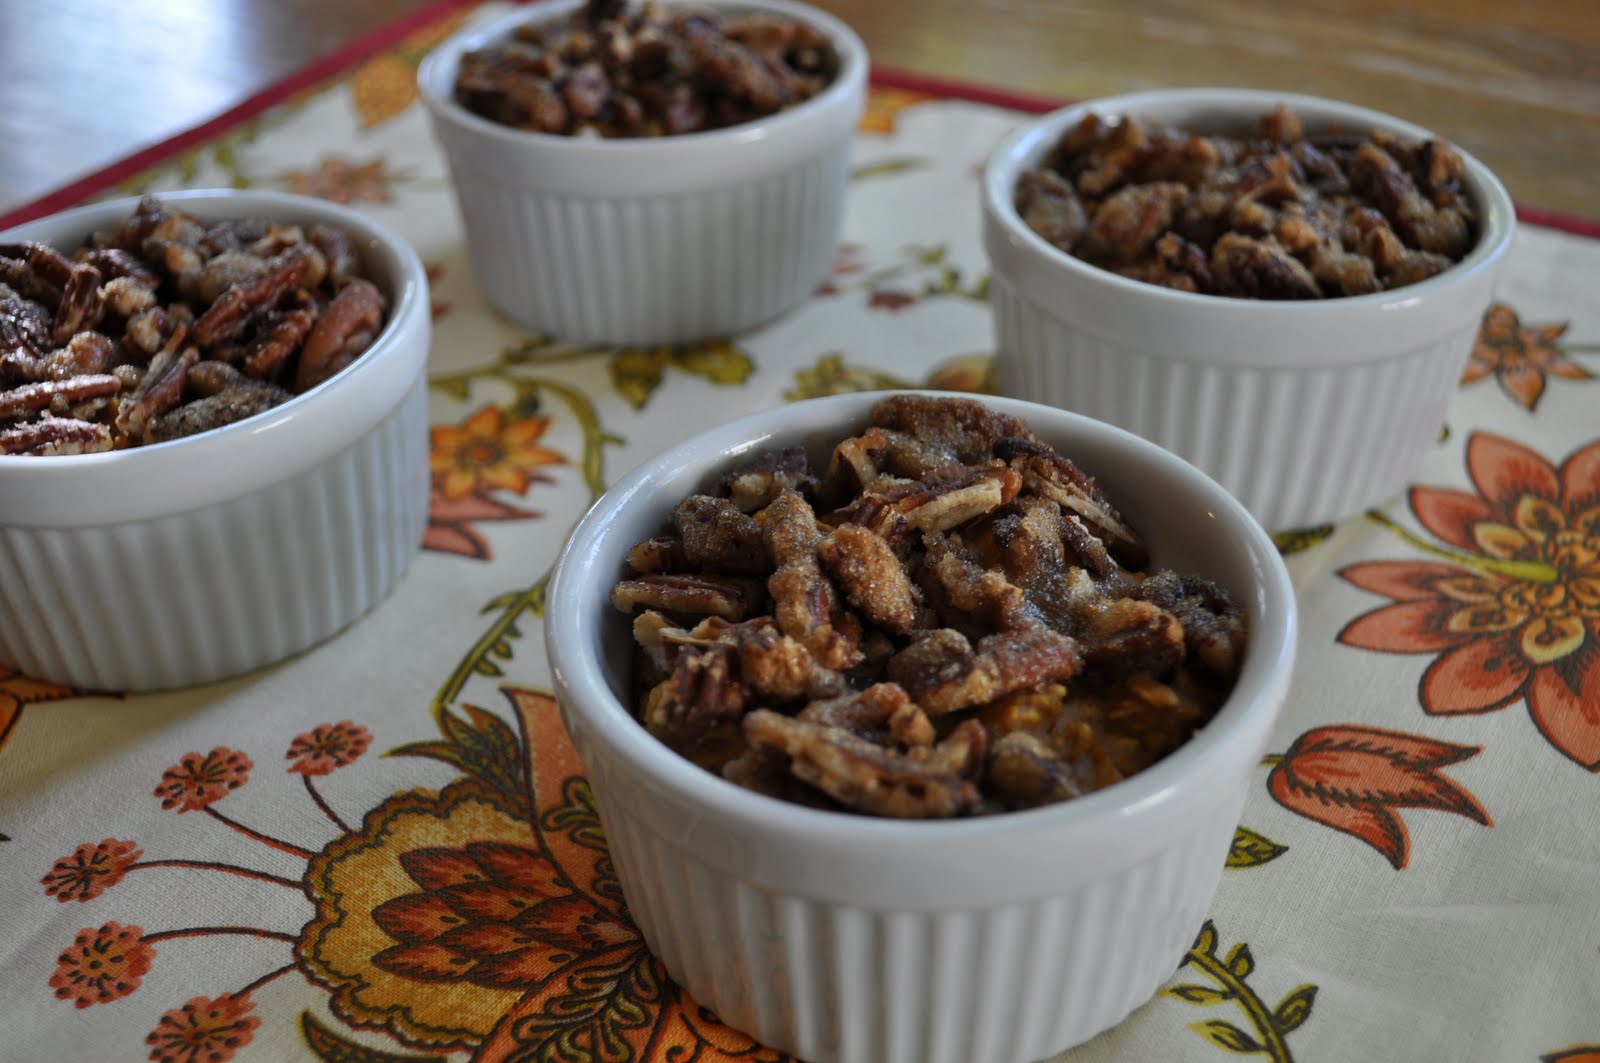
Pumpkin Pie Oatmeal:
These were quick to make and an unbelievably delicious way to start the day. Pumpkin pie has a little whipped cream on top, so why not this oatmeal?
Pumpkin Pie Oatmeal
(Recipe found at GoodLife Eats)
- 1 cup old fashioned oats, not quick cook
- 1 Tbs whole flax seeds, optional
- 2 1/2 Tbs brown sugar, packed
- 1/2 tsp cinnamon
- 1/4 tsp allspice
- 1/8 tsp nutmeg
- 1/2 tsp lemon zest
- 1/4 tsp salt
- 1/2 tsp vanilla
- 2 tsp butter, softened
- 3/4 cup pumpkin puree
- 3/4 cup milk
Topping:
- 1/4 cup pecans, chopped
- 2 tsp butter, softened
- 1 Tbs brown sugar
Preheat oven to 375 degrees F. Grease 4 individual sized ramekins. Set aside.
Combine the oats through salt in a medium sized bowl. Stir well. In a separate bowl, combine the vanilla, butter, pumpkin, and milk. Whisk thoroughly. Pour the pumpkin mixture into the oats. Stir until combined.
Divide mixture evenly between 4 individual sized ramekins. Place ramekins on a baking sheet (this makes it easier to move in and out of the oven.). Bake at 375 degrees F for 10 minutes.
Meanwhile, combine the ingredients for the topping: chopped pecans, butter, and brown sugar. After the oatmeal has baked for 10 minutes, remove and divide topping mixture evenly between the ramekins. Bake and additional 7 minutes. Cool for 5 minutes before serving. Top with a splash of milk and raisins, if desired.
Monday, August 16, 2010
Peach Pie
Before being thrown into the oven:
5 cups peeled, sliced peaches (5 or 6 large peaches)
1/2 to 3/4 cup granulated sugar
2 1/2 to 3 tablespoons cornstarch
Dash of ground nutmeg
1 egg white, lightly beaten
1 tablespoon lemon juice
1/8 teaspoon almond extract
1/3 cup packed light brown sugar
1/2 cup flour
6 tablespoons unsalted butter
1/2 cup finley chopped pecans
Preheat oven to 425.
Wednesday, June 16, 2010
Teacher Gift
You can find a free template and instructions for this project here.
Thursday, June 3, 2010
Strawberries!!
Last Saturday we went to Homestead Farm in Maryland for some strawberry picking. The strawberries were SO delicious and we unintentionally picked over 10 pounds. It turns out that our family has no problem using up 10 pounds of strawberries in a few days.
First up, 24 jars of delicious strawberry jam:
We needed something yummy to try it out on, so I made my favorite biscuits:
Then it was time for strawberry desserts. This was my first attempt at making a tart. I don't know why it took me so long to get a tart pan:
My friend Sarah introduced me to this delicious and quite easy strawberry tart recipe. I used an 11 inch tart pan and the recipe called for a 9 inch, but I think it turned out okay.
Strawberry Tart
Crust:
1 1/4 cups flour (spooned and leveled)
1/2 cup cold unsalted butter, cut into small pieces
1/3 cup sugar
1/4 tsp salt
Filling:
8 oz cream cheese, softened
1/4 cup sugar
1 1/2 to 2 lbs strawberries, hulled and halved
1/4 cup red currant jelly
Crust: Preheat oven to 350*. In a food processor, blend flour, butter, sugar, and salt until moist crumbs form. Transfer dough to a 9” round tart pan with a removable bottom. With floured fingers, press dough evenly into pan and up sides. Dip a dry-measuring cup in flour, and use it to press dough firmly into bottom and against sides of pan. Freeze crust until firm, 10-15 minutes. Using a fork, prick crust all over. Bake until golden, 20-25 min, pressing down gently once or twice with a spoon during baking if crust puffs up. Cool completely in pan. (Note: The crust really hardens up after cooling, so be sure to not overbake. It will get really hard. It tastes like a shortbread cookie crust.)
Filling: In a medium bowl, mix cream cheese and sugar until smooth; spread mixture evenly in bottom of baked crust (still in tart pan). Starting from outside edge, arrange strawberry halves, stemmed side down, in tight concentric circles on cream cheese (alternate cut strawberry side with each circle). In a small saucepan, heat jelly on med-low until liquefied. Gently brush strawberries with jelly; let set at least 20 minutes. Chill in pan at least 1 hour (and up to 6 hours); remove from pan just before serving.
And finally, Strawberry Brown Butter Bars. YUM! The recipe was originally made with cherries, but strawberries were so delicious. You can find the recipe here.
Monday, May 31, 2010
Blueberries and Lemon
I made some desserts for a baby shower a few weeks ago that turned out really yummy.
I saw these cobblers baked in jars at Not Martha and thought they would be really fun to try. I pretty much followed her directions, but I couldn't find the wide mouth jars. Mine were the same size, just skinnier and taller and they seemed to work just fine. I made my own labels to fit in with a girl baby shower.
Here they are right out of the oven. They smelled so good:
There is something really cute and satisfying about individual little jars of desserts:
(They are extra good with a small scoop of vanilla ice cream dropped inside when you're ready to eat.)
The directions for making the cobbler in jars can be found here.
(Next up...I'm going to make cupcakes in a jar.)
I thought not everyone would like blueberries so I also made some lemon cupcakes. I was really happy with this recipe that I found through Stephmodo. The combination of the cupcake and the frosting was perfect. Definitely try this recipe if you like lemon. I didn't attempt the candied lemon peel, but maybe next time. A simple raspberry on top did the trick.
Thursday, March 4, 2010
Spring is Here!
It's not quite spring, but close enough. Spring in D.C. is one of my favorite things. A few of our favorite activities are coming up.
The Smithsonian Kite Festival is happening on Saturday, March 27 from 10 a.m. to 4 p.m. at the Washington Monument. The atmosphere here is always so carefree and fun...how can you not be happy while flying a kite? There is an actual competition, but many people just show up to fly their own kites for fun. Click here for more information.
And of course, the Cherry Blossom Festival. For a complete list of all of the events, click here. Last year, we really enjoyed attending the fireworks at the end of the festival. This year, they are at the beginning of the festival on Saturday, April 3 at the Southwest Waterfront. We watched them from Hains Point and there were hardly any people there. It's a great display.
Another great place to see blossoms is the National Arboretum.
Printing with handmade stamps

I love trying out various printing methods and this book has some fantastic ideas. I recently attempted some handmade rubber stamps. I'm having fun experimenting with the whole process and I'm excited to try some other printing projects soon. I have a plan to screen print a new duvet cover for our bed, although I'm a bit intimidated by the prospects of printing on something so large.
Here are the results of my attempts with the rubber stamps. I carved two different stamps and printed a few bags and some stationery: