Saturday, November 8, 2008

Sew crazy.

Sewing machines come with a certain intimidation factor. I have to admit that for nearly a year, I sewed everything with purple thread because I was afraid to change the bobbin or thread my machine, fearing that it would never work again if I touched anything. In the past, my sewing machine would only come out of the closet when my mom was in town. So during her latest visit a few weeks ago, I was prepared with a few patterns and lots of material. I had an apron pattern that had been sitting on the shelf for months, staring me down with its pretentious "anyone can make this" attitude. I knew I could attempt it with the assistance of my mom. She gave me lots of tips and explained the basics of following a pattern. After she left, I was an expert at threading my machine, winding a bobbin, changing a bobbin, and now realize that it's actually quite easy. Of course, I am also an expert at picking out incorrect stitches.


It's reversible!


A friend gave me an easy skirt pattern and I tackled this project by myself and discovered that sewing can even be a little rewarding, and addictive. I've made 5 skirts so far, which is good since Amelia refuses to wear pants. She models a few...
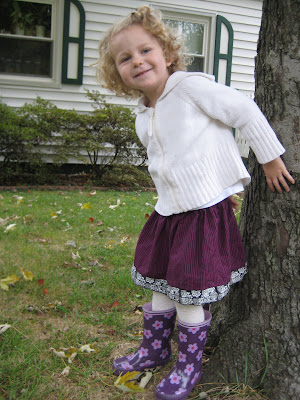


When I break out my sewing machine and crafting supplies, I go crazy. Partly because I have nowhere to set up shop permanently so the dining room turns into a crazy mess and I want to get as much done while everything is out. So in addition to the sewing, I experimented with some custom freezer paper stencils. My brother and his wife made us fantastic shirts last year using this method and I wanted to try it out for myself. I went a little crazy with this as well, attempting to spruce up any fabric in sight.

The result:


I couldn't resist combining the two...I stenciled some plain fabric and then made a skirt with it.

Friday, October 10, 2008

Hoopla.

My most recent project has been creating wall hangings using embroidery hoops, fabric scraps, and my sewing machine. I stole the idea from someone else and played around with it. After I made a few wall hangings, I decided to experiment a bit more. I have a tendency to turn various items into clocks and the hoops were no exception.


Wednesday, September 10, 2008

It's no longer hip to be square...

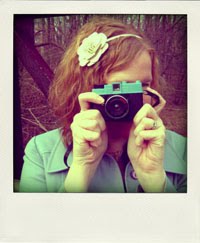
...at least according to Polaroid, who has officially ceased all instant film production. Digital killed the Polaroid star, and one of my old hobbies, which I suppose was pretty much dead already.

Here is my Polaroid lament.

If past habits are any indicator, it wouldn't be surprising to know that in addition to my many other collections, I also had a pretty large collection of old Polaroid cameras. When I left college, I decided it was time to downsize my moving box collection so I gave most of the cameras to my old photography teacher, but I did keep my 1971 Polaroid 450 that I used to do emulsion transfers (see photo below). I also kept a 1965 Swinger, mostly because it was in amazing condition and came in a fabulous case.

There is endless fun to be had with Polaroids and endless experimenting to be done with various types of film and transfer methods. Polaroid is the "Honest Abe" of photography. (Too much?) No dark room manipulation. No Photoshop filters. Just unique textures and colors capturing a real moment. It is instant analog gratification. The imperfections of the cameras and the film make the end result all the better. Who doesn't love staring at that empty little square, just waiting for the image to slowly appear before your eyes.

Let's face it. Most of our digital photos sit on our hard drives or in our memory cards and will never see the light of day (or the ink of a printer). The Polaroid gives you this permanent record of a moment that otherwise may have been deleted because someone made a funny face.

All that being said, I just used my digital camera to take a picture of the Polaroid cameras. So yeah. Here are the ancient relics, along with some emulsion transfers I did long ago (some of you will recognize the locations).


Sunday, June 22, 2008

Green Cake

Amelia requested a frog cake for her 3rd birthday. My hand was a little sore from squeezing frosting by the end, but she was pleased with the results. I used one round cake for the body, 2 cupcakes for the eyes, and cut the legs out of a rectangular cake. Then covered it all with loads of green frosting.

Saturday, June 14, 2008

The room reveal.

I spent most of my pregnancy working on a new room for Amelia. It was really fun to create a room completely from scratch and it was the last room in our house that I hadn't really done anything with. The inspiration for the room came from this great cabinet we found at a flea market in Arlington. It's an Eastern European liquor cabinet from the 1940's. We refinished it and then used the curved lines of this piece to create other furniture for the room.


Before:

After:

After patiently searching Craigslist, I found this great dresser from the 1950s that only required a little bit of touch-up.


I found this great couch for the "reading corner" and then painted it purple. I was so excited when I found these old pillow cases in our attic that were green and purple. They didn't quite cover the couch, so I added in some extra purple fabric and made a slip cover for the couch. My mom ingeniously figured out how to fit it perfectly to the couch.


I designed a toddler bed and Ben did an amazing job building it. After a little trial and error, he pulled it off and it is one sturdy bed. Since he handled the building of a bed quite well, we designed a book case for the room that matched the bed and he built that too. (Notice the fabulous wall art courtesy of Emily Martin at the Black Apple.)


I made a toddler bed size duvet and my mom sewed a great duvet cover for it. She also made a pillow and a pillow case for the bed.


Amelia loves her little coloring station. The pots hold all of her crayons and art supplies.

Friday, January 18, 2008

MY-KEA

I love cubes. I love cube systems. I can't get enough of them in my house. So we decided to ditch our broken dresser for something more functional. Enter the cube system. But it needed to be unique and classy. So we went to IKEA (the functional part) and purchased yet another unassembled piece of furniture and modified it to make it our own. It was a difficult process at times but after several trips to Lowes, we made it work. We're quite pleased with our collaborative effort. Next project: turning our old armoire into an entry way storage bench...

Create design blog. Check.

I could spend hours (and have) browsing the world of design and craft blogs. It is so fun to get ideas for new projects and find so many tutorials and recommendations. Ben has been telling me for awhile that I need to stop spending all of my time looking at other design blogs and create my own. So here it is. It will be nice to have a place to keep track of all my projects, share my findings with others, and link to other fun ideas I find.